 hello there, today I have been making a 3D watering can.
You can find the template here on splitcoast stampers webpage- splitcoast stampers.
hello there, today I have been making a 3D watering can.
You can find the template here on splitcoast stampers webpage- splitcoast stampers.I hope you have all been having fun trying new things or just crafting in general.
firstly you have to cut out the template and fold the flaps (if that is the correct terminology), and all four sections in I don't currently own a scoring board, so have to do it free hand just takes a little longer is all.

I had to make a little slit in the main part of the template, as I stuck
the long piece of the spout before I realised I had folded it wrong,
and the red tape didn't want to budge so stayed with it and improvised.
You wouldn't normally fold it in half, each part folds at the end of the rectangle, makes it look 3D.
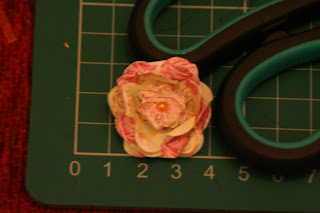
To make the flower bellow I used two different sized flower punches.
With the large flower punch I punched 4 with two different although complimenting papers from the rose garden collection.
With the smaller punch I cut 7 with the same paper. It was the same as one of the larger flowers as there was a lot more colour difference in the particular design .
To assemble the paper flower I stacked the large flowers (yellow then pink) while offsetting each one.
I did the same with the smaller flowers, then distressed the edges of all the layers and finished of with a pearl gem.
To glue everything on I used UHU Power glue as it is clear drying, and if it seeps out the edges a little just wait for it to go tacky and it rubs away.You can use the glue designed for crafter's although I feel, the only differences are the price and smell.
I used a foliage die, the left over large flower as I punched 5 instead of 4, and two small butterflies (you can see them in the top picture), and a Spellbinders labels 14 die to stamp and heat emboss a sentiment on to, the papers used where from the same paper stack as the ones used to make the flower.
Just to add the paper pack was free in Quick Cards Made Easy magazine, but sshhh it's a secret.
Just to prove how easy they are to make my 4 year old daughter Shona-Rose made the purple one, and decorated it with stickers and cut out little birds and put them on the side although you cant see them in the picture.


No comments:
Post a Comment